

Post by Death_Awaits on Oct 21, 2005 6:54:31 GMT 5
Full basic sig tut.
By Death_Awaits.
For this, you need This render , This font and either PSP or PS. (I'm using PSP9 for this, so things might be different for PS users. This also might work with older versions of PSP)
Okay, to start out, open a new document, make it
450 X 150 pixels big.
Then select the flood fill tool and color it a light blue.
So it should look like this:

Next, select the brush tool, and select a good grunge one. (I'm using this set, psp,PS) Then make a new layer, and brush it.
Should look something like this:

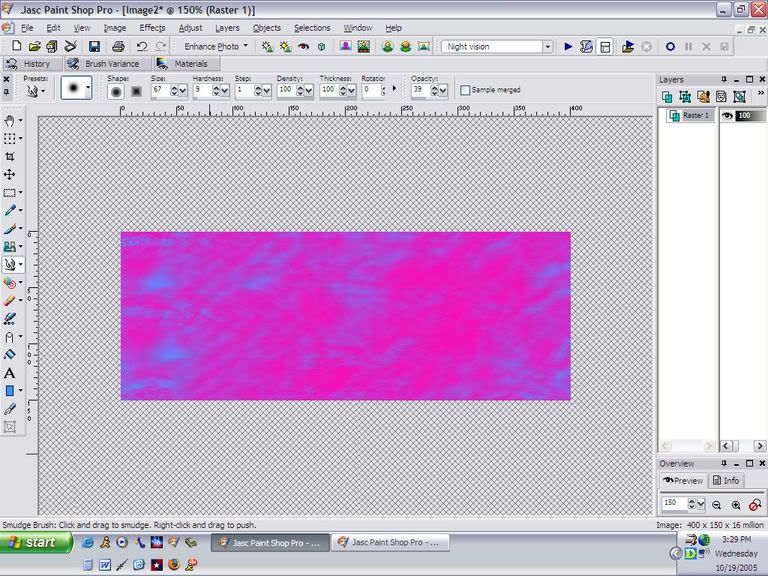
Then select the smudge tool, and set the settings as followed: Size = 67 hardness = 9 Step = 1 Density = 100 Thickness = 100 Rotation = 0 Opacity = 39
Then smudge it around so everything looks kinda blurry, like this:
Next, go to Adjust>Color Balance>Channel Mixer,
and enter these settings:

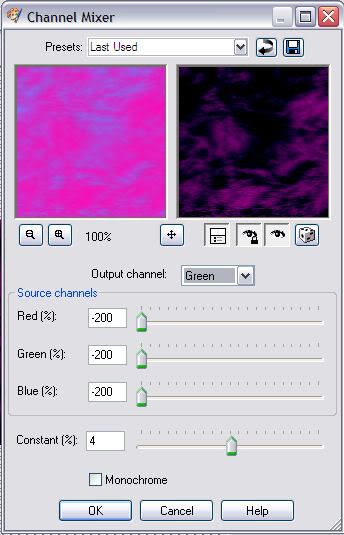
 , then select okay. (note, If you are using different colors than me, then just hit the random button till something looks good. Or just mess around with the knobs.
  )
)
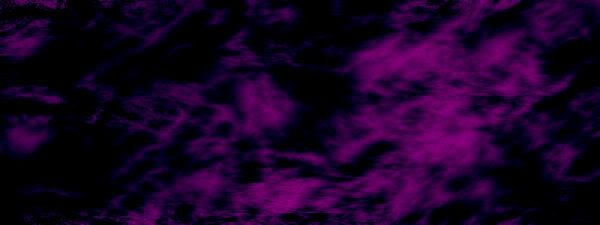
You should now have something like this:
Next, extract the render (use magic wand settings: Tolerance = 2, Feather = 2) and copy it.
Then make a new layer, and paste the render as a selection. Go to Image>resize and enter these settings :
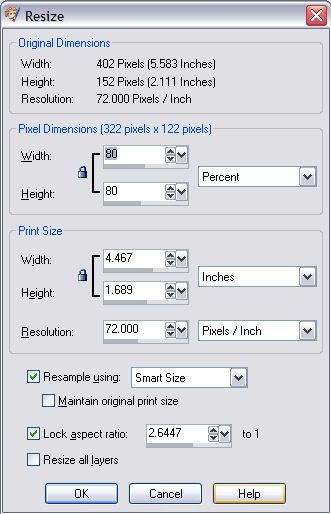
Then go to the same thing and enter these settings:

And place the render to the right side of the sig. Make sure that the render is it's own layer. Now duplicate that layer. Select the layer, and go to selections>modify>feather and enter these settings:

Press okay, then go to selections>invert. Press the Delete button on your keyboard ONCE!
Then go back to the original render, duplicate it again, then go to adjust>Hue and Saturation>Colorize.
Enter these settings (If your using my colors, if not, play around with it. Try to match it with the background.):
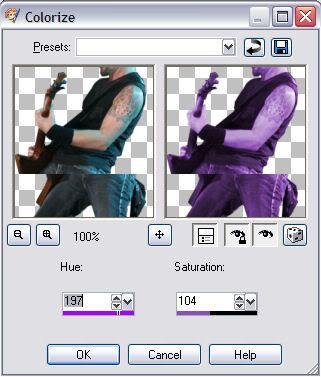
And set the blend mode to color. Now make the original render layer invisible. So the sig should now look something like this:

Now time to add text.
Click on the text tool, set it to create as vector. Click where you want the text, select the font (tribal 2) set the color to white, stroke width = 0 and type in James Hetfield (or whatever you want). Click okay, and then rotate it (or don't, your choice)
Should look like this now:

Now, convert the vector to raster. Select the text, then select the backgound in the layers palette. Go to Selections>Modify>Contract and contract it by one.
Having the Background layer still selected, copy it. Go up to the text layer, and paste it as a selection. Position it so that a little white shows the selection. Like this:

Now go to selections>Select none.
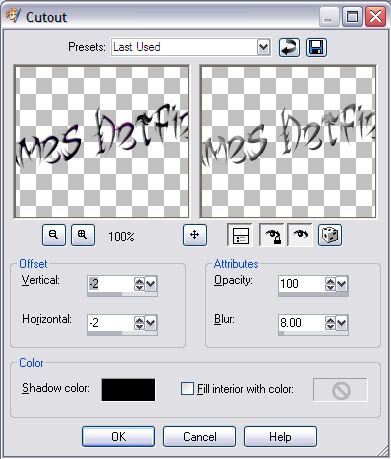
Select the text again, and go to Effect>3D Effects>Cutout, and enter these settings:
Press okay. Now go to Effect>3D Effects>Drop Shadow. Enter these settings:
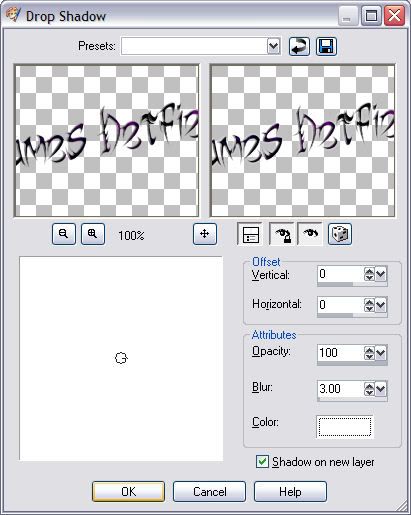 .
.
You are now done! Do anything extra you wish to do before moving on to the next step.
Border
This is really simple. Go to Image>Border and enter these settings:

Here is the finished product:

IM, PM, Email, or post in this thread if you have questions. Might go over blending in a seperate tut.
By Death_Awaits.
For this, you need This render , This font and either PSP or PS. (I'm using PSP9 for this, so things might be different for PS users. This also might work with older versions of PSP)
Okay, to start out, open a new document, make it
450 X 150 pixels big.
Then select the flood fill tool and color it a light blue.
So it should look like this:
Next, select the brush tool, and select a good grunge one. (I'm using this set, psp,PS) Then make a new layer, and brush it.
Should look something like this:
Then select the smudge tool, and set the settings as followed: Size = 67 hardness = 9 Step = 1 Density = 100 Thickness = 100 Rotation = 0 Opacity = 39
Then smudge it around so everything looks kinda blurry, like this:
Next, go to Adjust>Color Balance>Channel Mixer,
and enter these settings:
, then select okay. (note, If you are using different colors than me, then just hit the random button till something looks good. Or just mess around with the knobs. )You should now have something like this:
Next, extract the render (use magic wand settings: Tolerance = 2, Feather = 2) and copy it.
Then make a new layer, and paste the render as a selection. Go to Image>resize and enter these settings :
Then go to the same thing and enter these settings:
And place the render to the right side of the sig. Make sure that the render is it's own layer. Now duplicate that layer. Select the layer, and go to selections>modify>feather and enter these settings:
Press okay, then go to selections>invert. Press the Delete button on your keyboard ONCE!
Then go back to the original render, duplicate it again, then go to adjust>Hue and Saturation>Colorize.
Enter these settings (If your using my colors, if not, play around with it. Try to match it with the background.):
And set the blend mode to color. Now make the original render layer invisible. So the sig should now look something like this:
Now time to add text.
Click on the text tool, set it to create as vector. Click where you want the text, select the font (tribal 2) set the color to white, stroke width = 0 and type in James Hetfield (or whatever you want). Click okay, and then rotate it (or don't, your choice)
Should look like this now:
Now, convert the vector to raster. Select the text, then select the backgound in the layers palette. Go to Selections>Modify>Contract and contract it by one.
Having the Background layer still selected, copy it. Go up to the text layer, and paste it as a selection. Position it so that a little white shows the selection. Like this:
Now go to selections>Select none.
Select the text again, and go to Effect>3D Effects>Cutout, and enter these settings:
Press okay. Now go to Effect>3D Effects>Drop Shadow. Enter these settings:
.You are now done! Do anything extra you wish to do before moving on to the next step.
Border
This is really simple. Go to Image>Border and enter these settings:
Here is the finished product:
IM, PM, Email, or post in this thread if you have questions. Might go over blending in a seperate tut.


